Whenever I’d see a well-curated cheese board, all I could think was – “There’s no way mine would ever look like that.” I get a similar feeling when I see the most gorgeous kitchen/living room/any room on Pinterest and realize thoguh it’s my style, I probably just don’t have the knack to retreat the ambiance. I’m here to tell you I’ve mastered one. And it’s easy. It’s obviously the one that involves cheese.
Although they seem intimidating, in all seriousness, cheese boards are just a hodgepodge of different layers arranged in a specific order. I promise you it’s the easiest thing and you literally can’t mess it up.
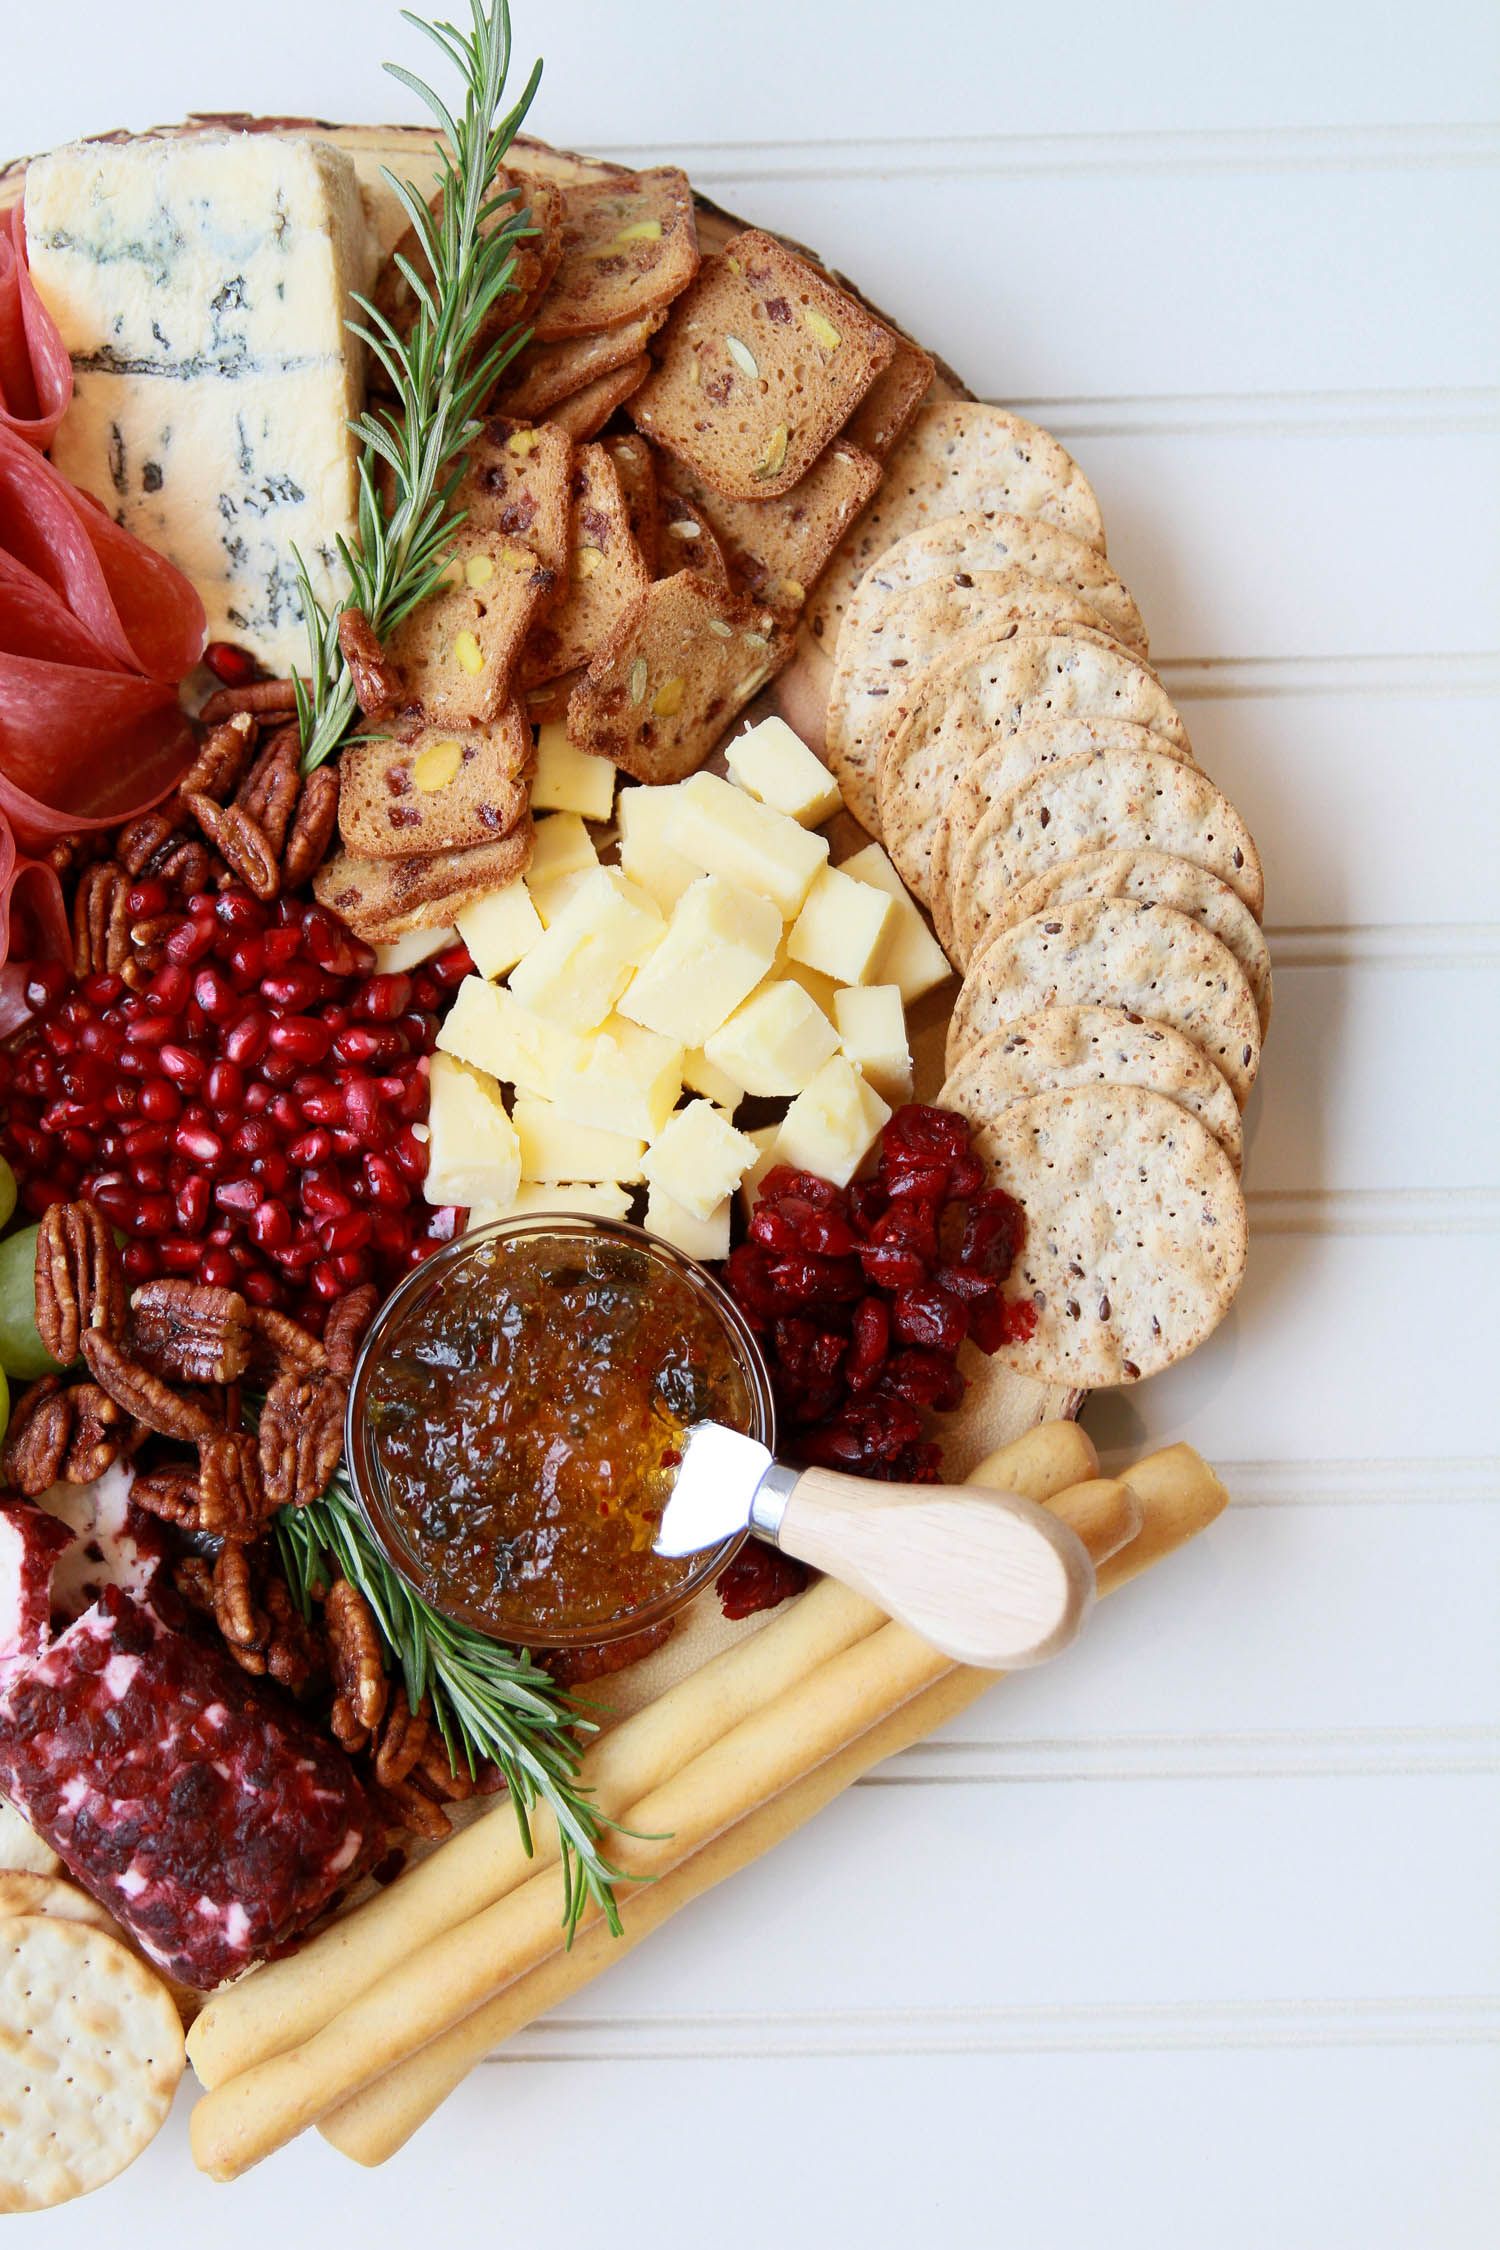
I wanted this to be a festive, holiday board, so I chose garnishes and filling ingredients true to the season. The process can be easily broken down into 5 simple steps.
Step 1: Pick Your Base
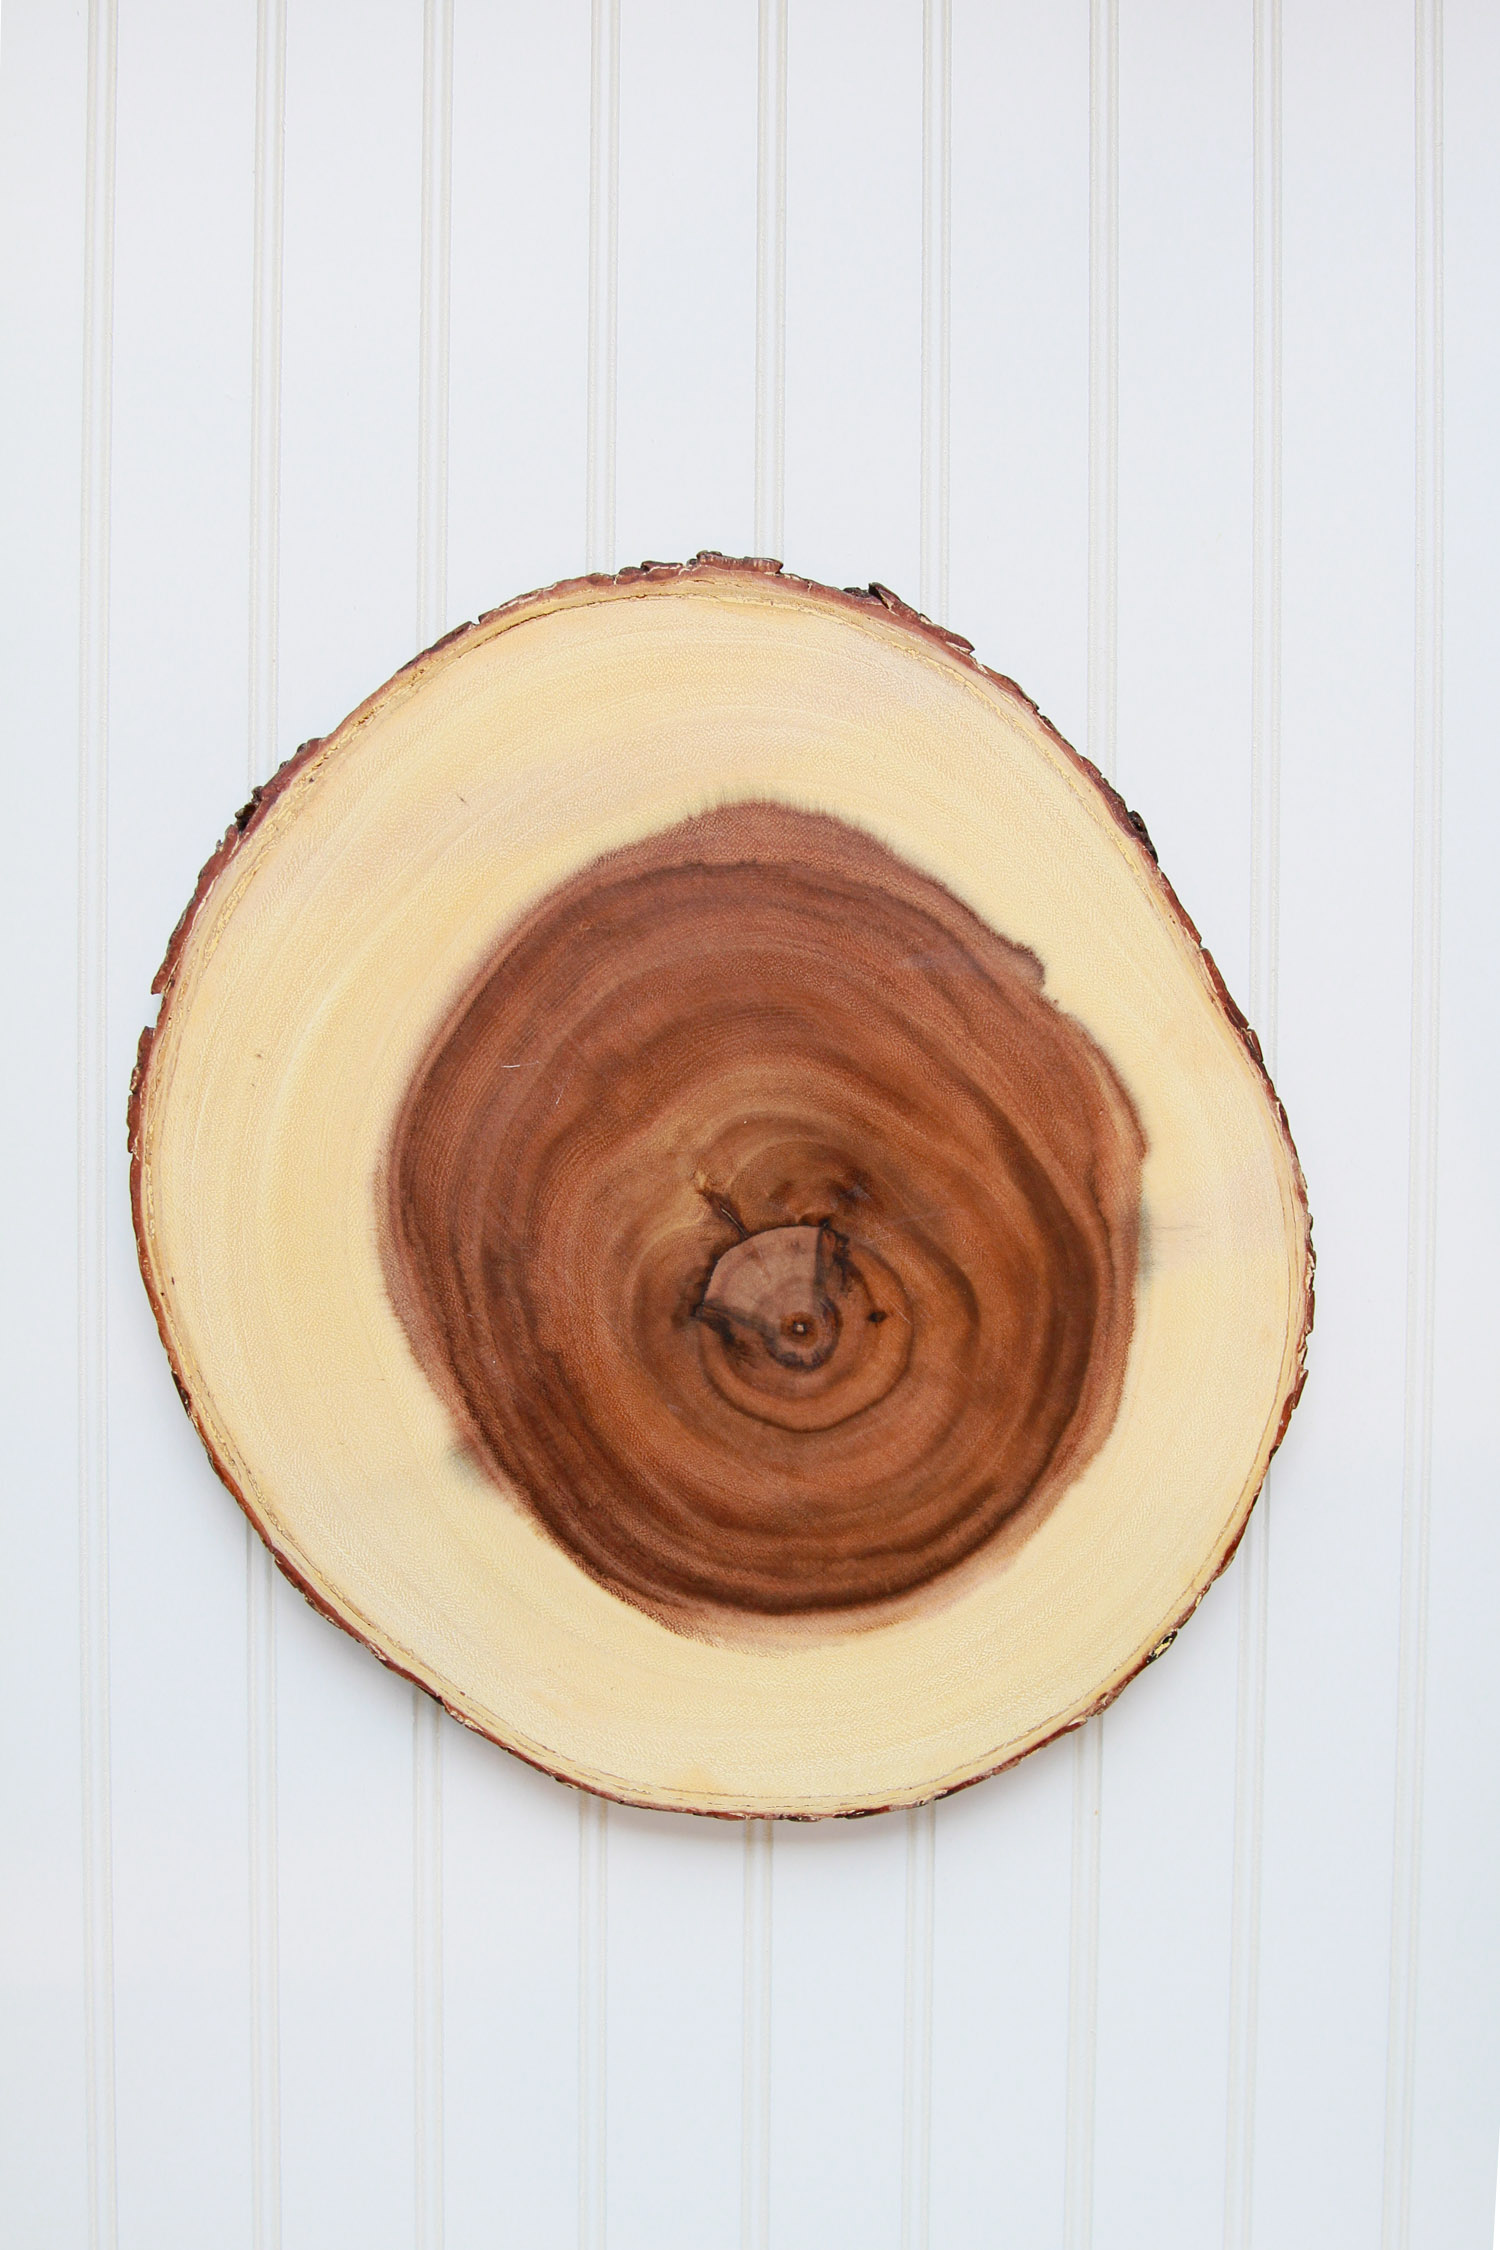
You can use just about anything for a base. I picked up this cool wood/log/tree (not sure what to call it?) serving platter at Marshall’s for $12. It’s oddly shaped and imperfect and I thought it’d make for the prettiest base for my hodgepodge cheese boards. In the past, I’ve used inexpensive clear serving dishes from dollar store. Obviously, a plain old cutting board works, too.
Step 2: Add Cheese
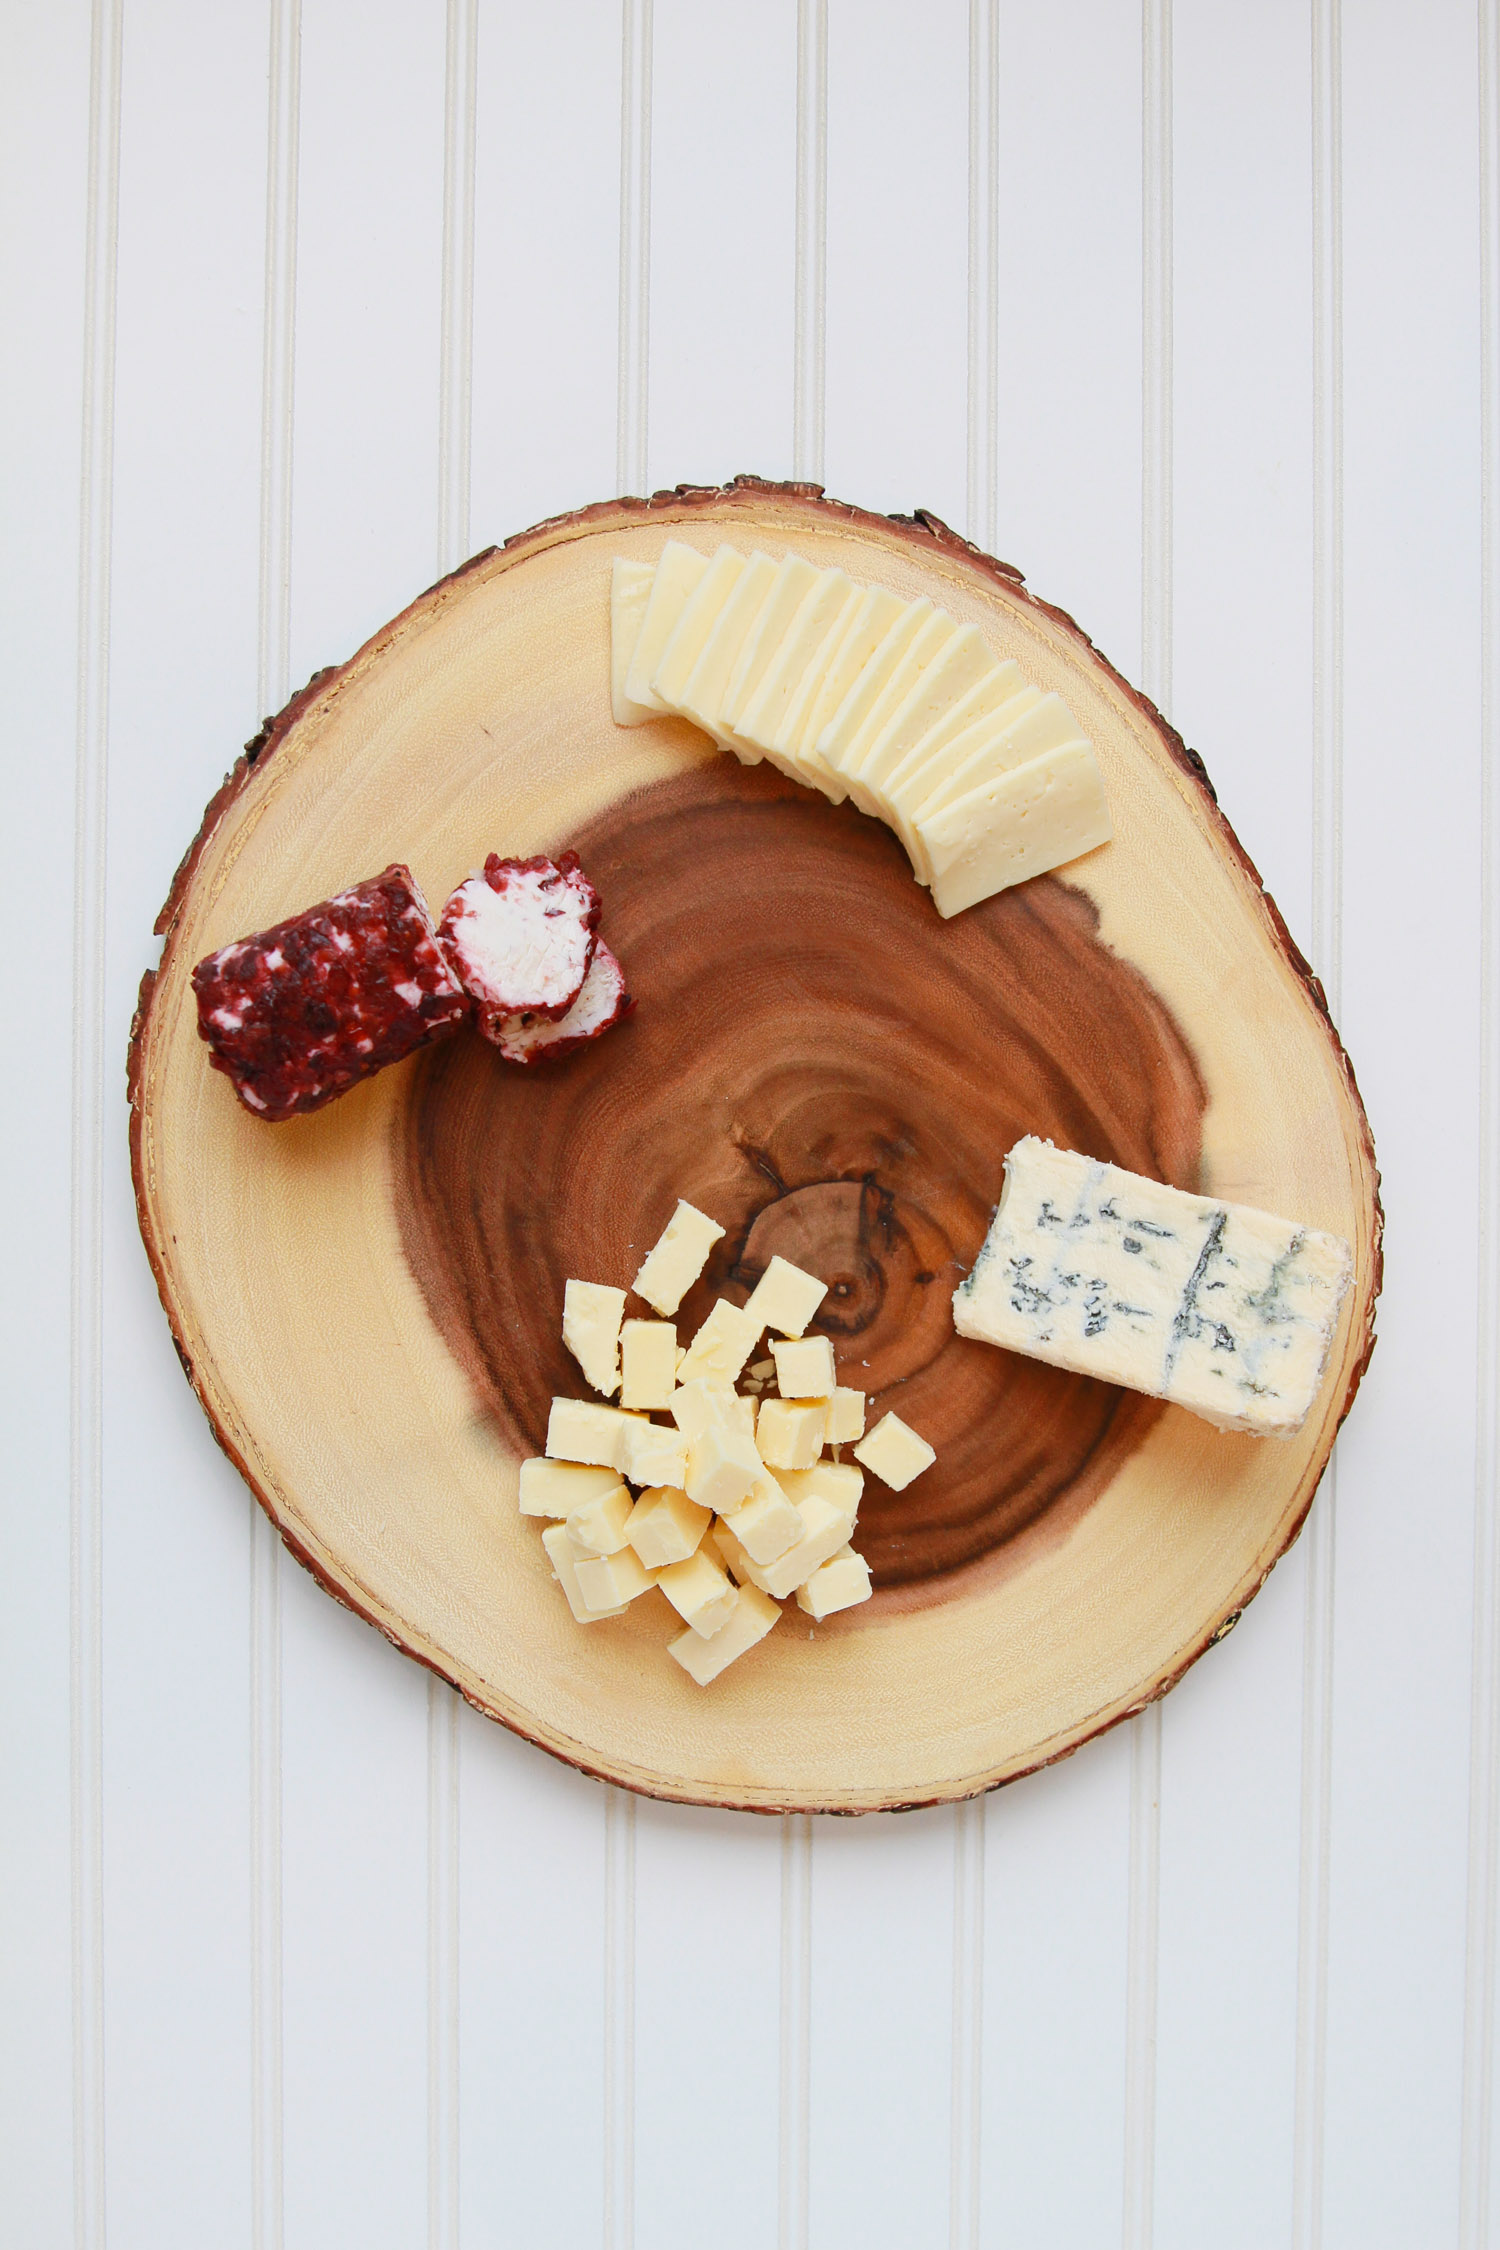
The most important part – the cheese! And yes, I’ll address the elephant in the room – cheese can get expensive. Like really, expensive. (The Mariano’s I shop at has an entire room dedicated to cheese and it’s easy to get sucked in.) So, I suggest starting with 3-5 types of cheese, and accounting for 3 ounces of cheese per guest. (I usually have a problem of making the boards too large, so I’ve never really worried about ounces.) My favorite places to shop for cheese are Trader Joe’s and Aldi. Seriously, the selection from TJ is insane! And Aldi’s isn’t quite on that level but they always suprise me with their selection. Both retailers offer very affordable options.
You’ve probably heard there are lots of “rules” to picking an assortment of cheese for boards. You’ll hear you should have a certain mix of flavors and softness. I’ve never followed this! Of course, I love having an assortment, but I prefer choosing different sizes and textures. I like to leave some cheeses whole, and cut up others. For the cheeses that will be harder to slice for your guests, cut in advance – or at least a few pieces to get started. For softer cheeses, I like to leave them whole.
Arrange those bad boys on your board – leaving some space around the perimeter for crackers and garnishes.
For this board, I used:
- Blue
- Sharp white cheddar, cubed
- Harvard, sliced
- Cranberry covered goat
Step 3: Add Meats + Dishes + Jars
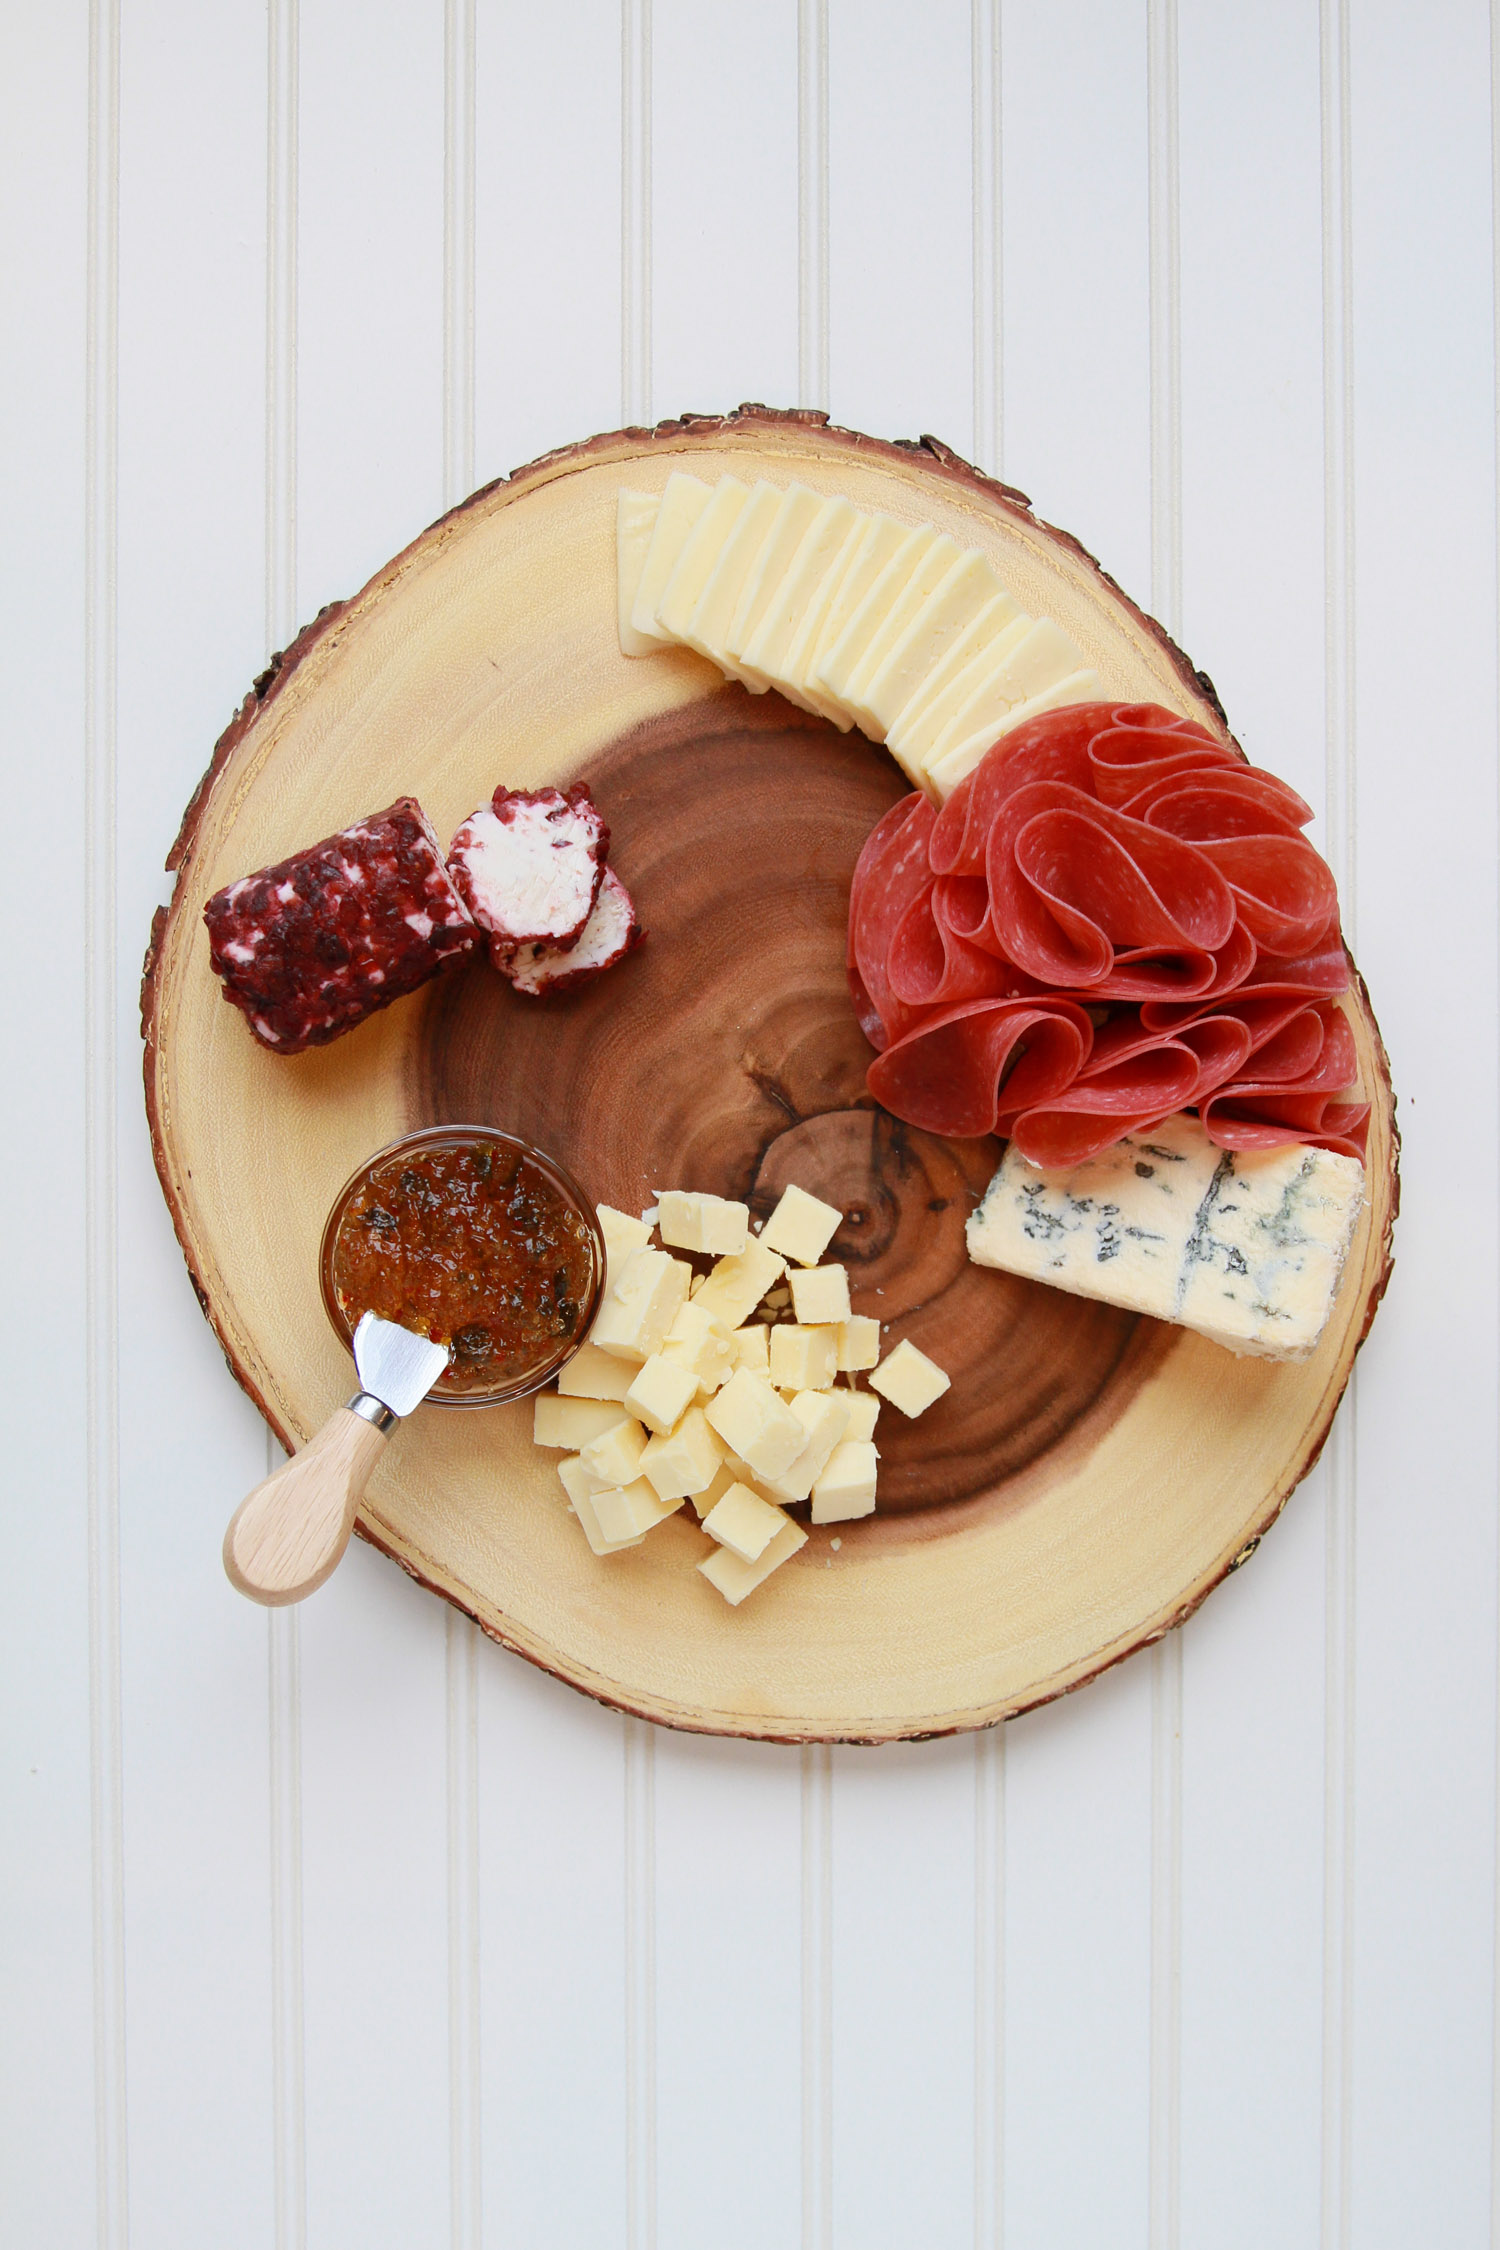
Meats and condiments are just as important. I kept it pretty basic for this holiday cheese board, but the options are endless. I usually go straight to the deli and ask for a small amount of salami. I take those thin slices and fold them into fourths, forming a “flower.” Stick them together beside a piece of cheese and you’re set!
To keep with the festiveness, I decide to include pepper jelly. If you’ve never had it, buy it. I have a few friends from Alabama and last year they introduced me to the pepper jelly + cream cheese + Wheat Thins dish that’s a staple in the South. It’s ridiculously delicious.
For this board I used:
- 1/4 lb. Salami
- Pepper jelly
Other options I love:
- Prosciutto
- Pepperoni
- Summer sausage
- Dish of olives
- Jams
- Mustard
Step 4: Add Crackers
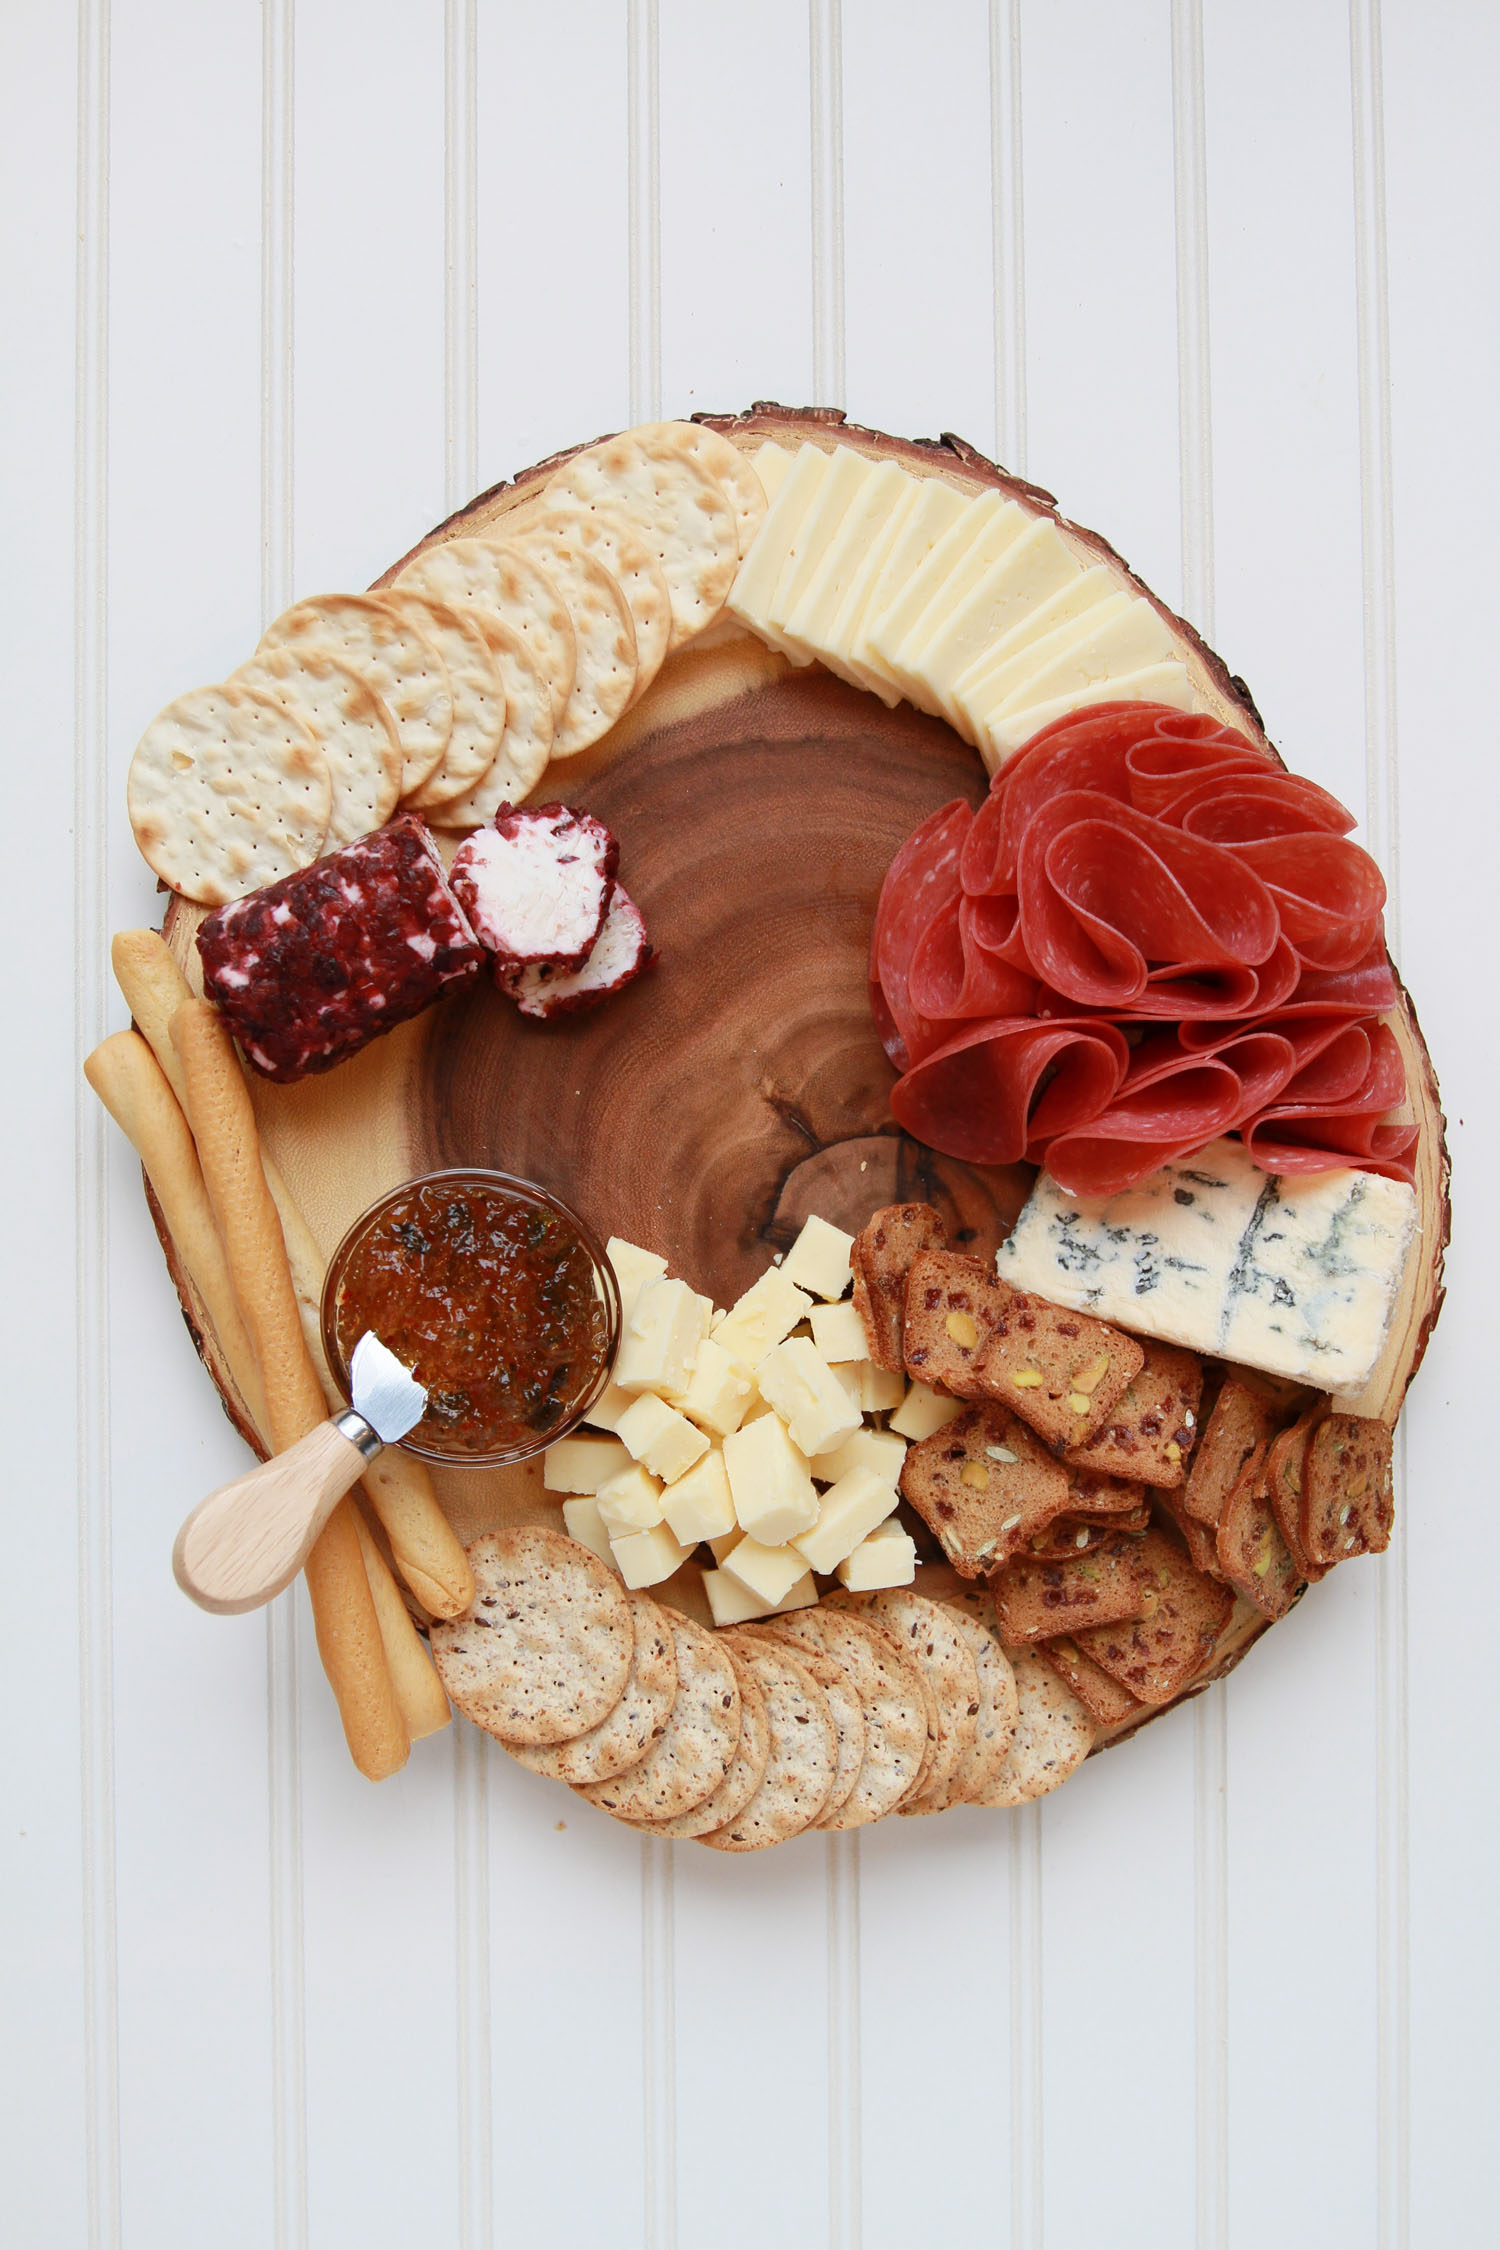
This is where it starts feeling awkward – but I promise – it will look great! The easiest way to knock this out is by buying a box of mixed crackers – it adds a bunch of different shapes and textures to board. (I usually buy mine at Aldi.) These are from a few different boxes I had at home – mainly Trader Joe’s.
Take one type of cracker and either accordion-style them out if they’re thin and flat – or drop them in a pile if they’re more misshapen. I like to fill in around the perimeter of the board, leaving only small gaps to fill with garnishes.
For this board I used:
- Water crackers
- Wheat water crackers
- Pistachio pomegranate crisps
- Cheddar breadsticks
Step 5: Fill + Garnish
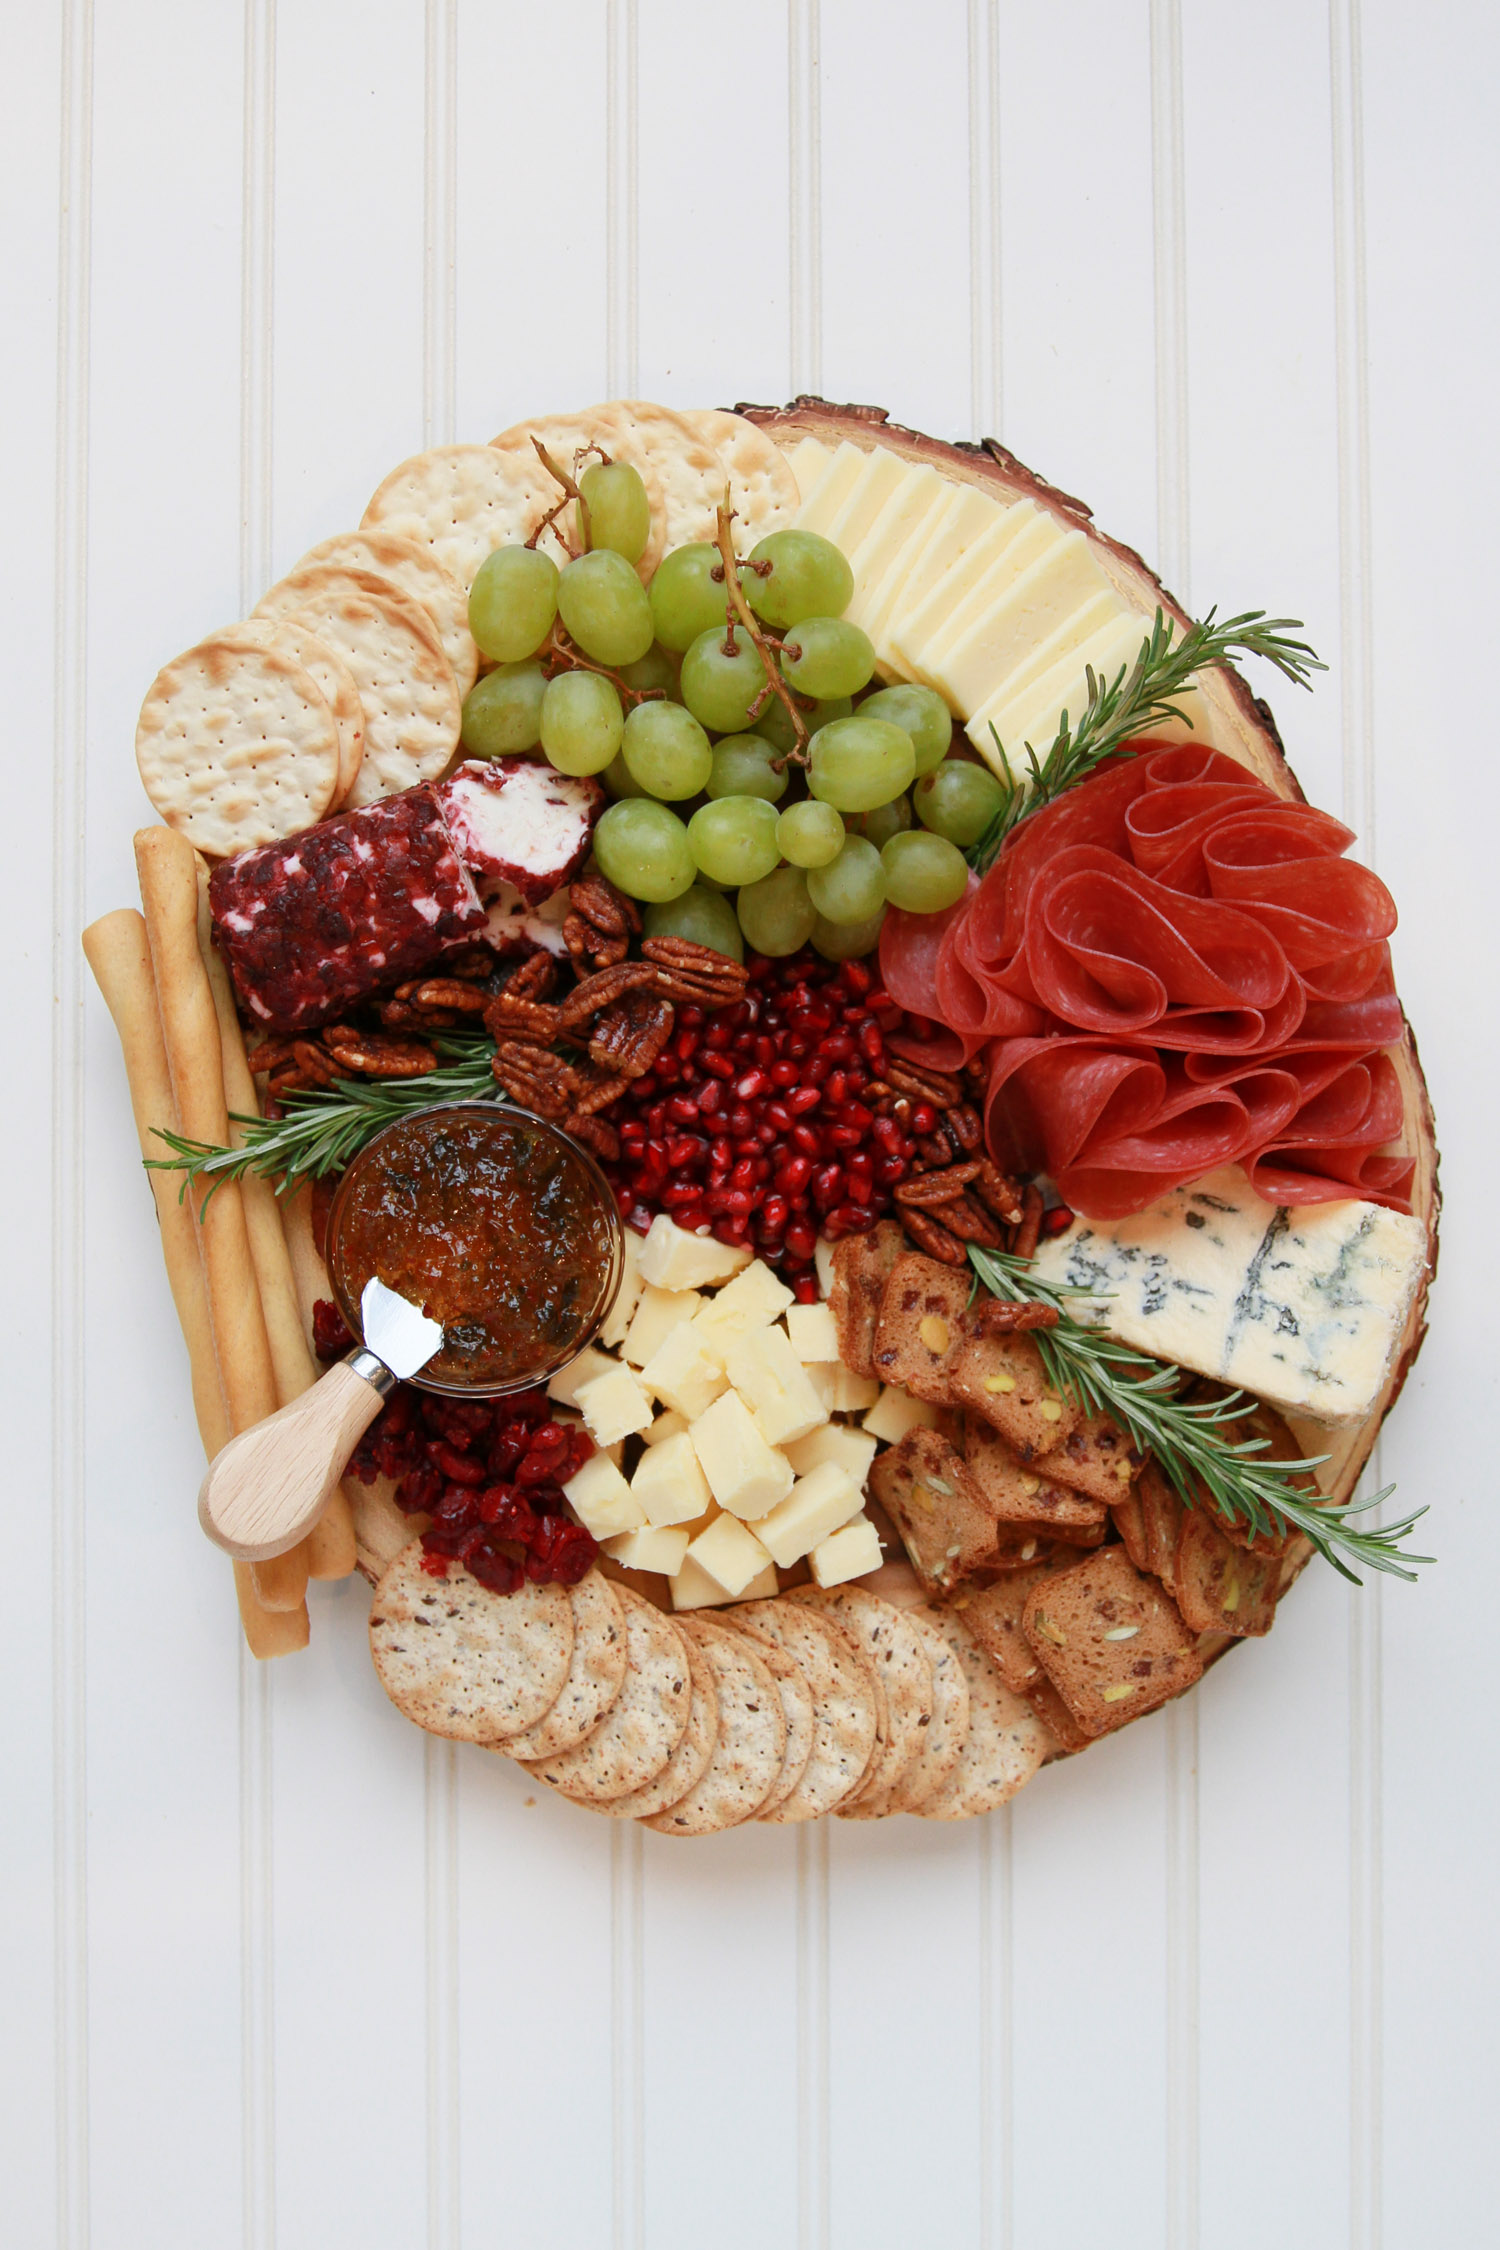
The fun part! This is where you can fill in all your gaps and erase any “mess ups” (let’s be real, it’s a cheese board, there are no mess ups!). Have fun with this stage. Take whatever you have lying around – nuts, fruits, herbs – and literally just drop them where it needs some filling. I wanted to keep it as festive as I could, so I tried to stick to seasonal colors and ingredients. Including rosemary – which I just used for the first time a couple years back. Also, I used pomegranate seeds and was worried they’d stain my board. They didn’t, but if you’re scared you can always use a piece of plastic wrap on the board before filling.
I then popped in some cheese knives that I scored from the $3 aisle at Target. And that’s it – you’re done!
For this board, to keep it festive, I used:
- Dried cranberries
- Pomegranate seeds
- Grapes
- Candied pecans
- Rosemary
Other options I love:
- Dried apricots
- Apples
- Tangerines
- Candied walnuts
- Peanuts
- Chocolate chunks
- Chocolate covered almonds
- Dried cherries
- Peanuts
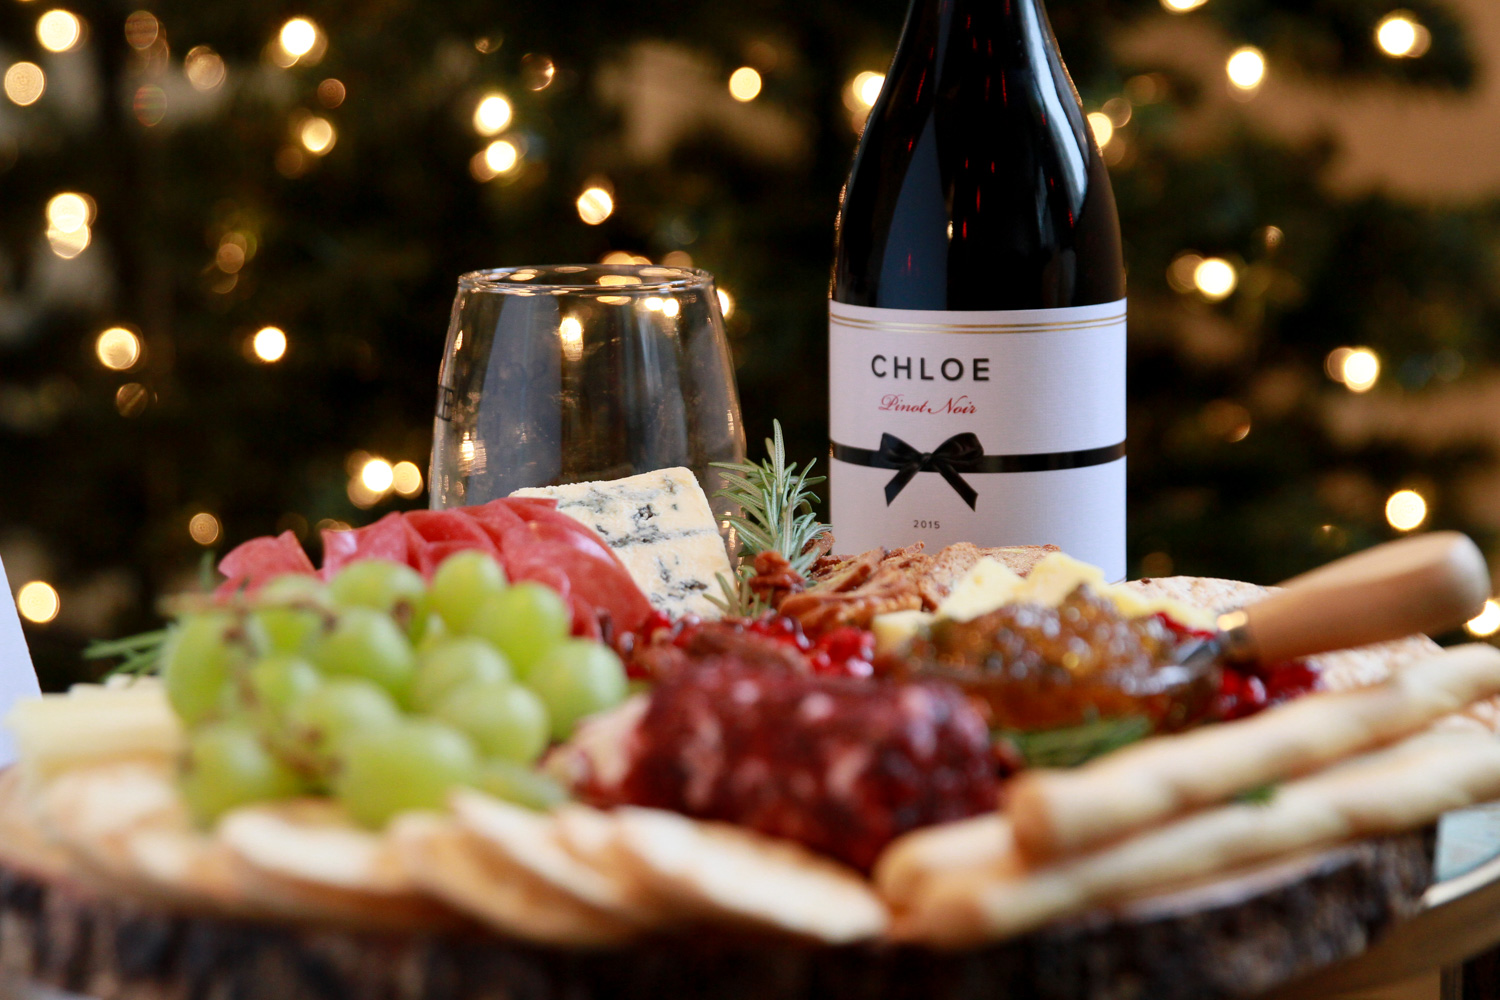
I’d love to know what else you prefer on your cheese board. This really is the prefect app to feed a crowd at a party, or for just noshing on alone in front of your tree with a bottle of red. Today, it’ll be the latter. ‘Tis the rseason, right?!